
Deck Guide: Combo Warrior
Author: Joseph Scalise
1. Introduction Combo Warrior
![]() 0
0![]() 1
1![]() 1
1![]() 1
1![]() 2
2![]() 2
2![]() 2
2![]() 2
2![]() 2
2![]() 2
2![]() 3
3![]() 3
3![]() 3
3![]() 3
3![]() 4
4![]() 5
5![]() 5
5![]() 5
5![]() 5
5![]() 8
8![]() 9
9
It is an inherent fact of Hearthstone that tournament decks are largely different than decks played on the ladder. This is because a lot of the tournament decks are fine tuned to the meta that will be at that tournament (which is why so many niche cards see play). However, despite this, after Blizzcon I still couldn’t help but be intrigued by many of the decks I saw. There was a lot of potential at that tournament, and I knew I wanted to take inspiration from one of the deck lists. After some debate (and playing my way up the ladder) I finally settled on trying to adapt Kranich’s Combo Warrior, a sweet list that I thought had a lot of potential for the current, aggro heavy meta.
After some playing around with certain cards and the numbers I finally put together a list that has taken me up the highest I have been this season (three). The list does just about everything Control Warrior does, but has something very important as well: the element of surprise. The element of surprise should never be underestimated in card games, and this list is a prime example of why. For most of the game people expect to be playing against Control Warrior, and will likely die to the combo because they never see it coming. In a tournament you may lose that element of surprise, but on ladder you can easily turn it to your advantage.
2. Key Cards
There are many cards in this deck that come straight out of Control Warrior which do not need to be discussed. However, there are some cards that operate differently in this build and those will be outlined below.
I’m not going to discuss every part of the combo, but I am mentioning Inner Rage to discuss the combo itself. There is only one piece of the larger combo (Charge, Raging Worgen, Rampage and Inner Rage) in the deck. However, Inner Rage is not a necessity to the combo, as both Worgen and Grommash can be proc’d in many different way such as Whirlwind and Cruel Taskmaster. This is important to remember. One of the elements of this deck is finding surprise ways to kill of your opponent. That doesn’t always mean using Worgen or Grommash (though it usually does). Inner Rage is a great way to put together a enrage kill, but this card can also serve many other purposes. Since it doesn’t cost mana, there are some times where you need to use it to draw a card off of Acolyte of Pain or to trigger Execute. You almost always want to try to save this card for as long as you can, but in dire situations you should not be afraid to use it for board control.
A very late addition to my own list (despite it being in the original) Whirlwind was added as yet another way to combat the Zoo/Hunter metagame. Haunted Creeper is everywhere, as are many other small minions such as Leper Gnome, Loot Hoarder and even Wolfrider. Add that on to the fact that Whirlwind gives you a way to trigger acolyte, Armorsmith as well as both worgen and Grommash and you have a solid winner. This deck does already run two Whirlwinds in the form of Death’s Bite, but having access to one you can play right away for a single mana is too good to turn down. This card usually isn’t a combo enabler (it’s more for control) but when you do play it you always want to try and pair it with either Armorsmith or Acolyte of Pain.
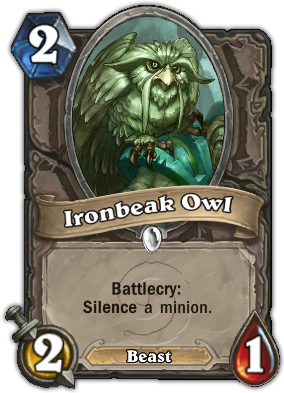 Ironbeak Owl
This card is so good in this deck I would even consider playing two, seriously. Silence is very important in the current meta as a way to battle a huge amount of the popular minions. That importance gets extrapolated in this deck because you are also running a combo that needs to get through taunts. Ironbeak Owl is a solid, two mana card that serves two purposes really well. On one hand it allows you to fight back against aggro decks, shutting down buffed Undertakers, Mad Scientists and Haunted Creepers. On the other it also works very well against slower decks by allowing you to bypass any taunts that get in your way such as Sludge Belcher. There are a lot of people who like Spellbreaker in this slot, but in a deck where you want to get the most out of your mana it is best to go with a two drop rather than a four.
As previously stated, the main combo in this deck is Inner Rage, Rampage and Charge. However, Rampage is a card that can also be used for surprise burst damage of board control. Charge plus an enrage trigger are the most important parts of the combo, while Rampage is only needed if you need to reach the twenty damage area. As such, sometimes I will play Rampage on a minion when I need to clear or when I want to apply early pressure during a game where I think I will not have the luxury of searching through my deck for Alexstrasza. Just don’t forget, there is only one in the deck so using this card should only be done sparingly.
I don’t want to beat the combo to death, but unlike the other finisher cards, worgen only has one purpose. You never want to see this card early, and you always want to hold it until you can pair it with the combo. There are some board states where it might be tempting to apply pressure or dare you opponent to have removal, but that is never the right move. Yes, you do have Grommash as an added way to push damage through, but almost all of my games are won on the back of worgen. The reason for this is that Grommash is usually only really strong when paired with Alexstrazsa, but Raging Worgen’s windfury allows it to kill people are much higher life totals without the dragon. If you lose this card early you are just cutting yourself off at the knees.
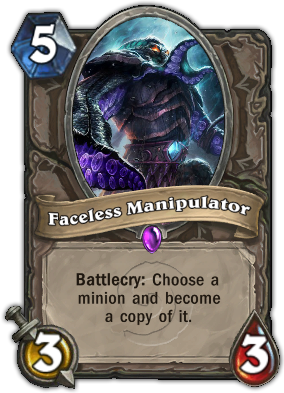 Faceless Manipulator
At first glance it may seem like Faceless Manipulator is here to copy the combo and swing in for huge amounts of damage. However, a second glance reveals that you can’t play worgen, charge and faceless in the same turn unless you have the coin (more on that later). Rather, faceless is in this deck as a way to combo with charge somebody else’s huge minion to finish them off. The deck runs two finishers in Grommash and Raging Worgen, but this acts as the unofficial third. There are a lot of big minions in the meta right now (Ragnaros, Savannah Highmane, Loatheb etc.) and all of them become a lot of fast damage when paired with Charge, Rampage and Inner Rage or Cruel Taskmaster. That combo itself takes a Loatheb and makes it twelve points of damage. If you have a Sludge Belcher on board (or another Loatheb) after using Alexstrasza that’s lethal. Even if you don’t have alex, you can swing out of nowhere using this card, Inner Rage and Charge.
While Raging Worgen is a card that should be saved for the right moment, Grommash Hellscream is a threat. Yes, he usually acts as a nice finisher when you don’t have all the pieces to the worgen combo, but you can also play Grommash onto an empty board with a little more confidence than worgen. This is the reason I bring this card up. When in a combo deck you can get caught up in just playing for the combo, but Grommash (especially when used to clear their last minion) does fine on his won on an empty board. Of course you want to use him as a finisher, but that doesn’t mean it’s all he is.
The Coin? In short, yes. I wanted to take a minute to discuss the importance of the Coin in this deck. While not a necessity, the Coin can act as a very important piece to winning some games against slower control matchups. The reason is that this deck runs Faceless Manipulator. Most of the time this doesn’t matter for the combo (as stated above) because Raging Worgen, Inner Rage, Charge and faceless costs eleven mana to put together. However, that mana is actually reachable with the Coin. Now, I am not saying you should save your Coin the whole game for this combo (that would be absurd) but against control decks who are going to have a lot of health it really isn’t a bad play. I have killed more than my share of priests utilizing the Coin in this way. Not your go to play, but something you should always keep in mind when you still have the Coin during the later stages of the game.
3. How to Play
At first glance it may seem that this list plays a lot like Control Warrior. However, while there are some similarities, the basis of this deck is the combo and not dropping huge legendaries onto the board. This is a key distinction because it changes the way you plan ahead. There is no Ragnaros or Ysera in this list. There is no giant minion that will come and save you at the end of the day. As such, you only are even going to get one real shot with this deck. Unlike things like Miracle Rogue (where you have multiple outs through things like Cold Blood and direct damage) there is no reset button. That means that you have to wait for the right opportunity to strike, and you can’t afford to miss that opportunity when it presents itself.
Weapons are also very important in this list. While there is the obvious synergy with Death’s Bite plus a finisher, both bite and Fiery War Axe also have the ability to add on damage. This is a deck where you always want to be aware of how close you are to lethal. Because of the amazing amount of burst damage in this deck you can never fully count yourself out of a game. If that means swinging into your opponent’s face when hoping for a topdeck then so be it. Sometimes it is those plays that win you the game. Overall, the point of this deck is to go into the late stages of the game, doing whatever it takes to stay alive until you can combo. Find early game answers, use your armor ability as much as possible, and always, always be aware of the amount of damage you have at your disposal. Missing lethal is not an option here.
4. How to Mulligan
As this deck does share many similarities with Control Warrior, you usually want to mulligan in the same way. Look for early came cards and card draw while getting rid of anything else. You always want to organically draw into the combo, as having it stuck in your hand can be really annoying. Your best opener is (as always) Fiery War Axe, and this should be kept against any class. You can afford to keep slower hands (i.e Sludge Belcher or Loatheb plus Coin) against slower classes such as Shaman or Paladin, but for the most part you always just want to search for removal. The only class specific card choice is to never mulligan away Cruel Taskmaster against Hunter or Zoo, where getting an early minion plus removal is key to taking a hold of the game. I will also always keep Loatheb against Shaman if the rest of my hand is cheap or if I have the Coin.
5. Matchups
 Zoo
Zoo
Zoo is a very interesting matchup that is basically decided in the first two or three turns of the game. If you can gain board control then it is very hard to lose, but if they start unopposed the game is basically over. The biggest threat they have is Loatheb (which Zoo decks are all starting to run now) and you should constantly be aware of this as he can really mess up a Brawl or a Whirlwind. Mulligan for Ironbreak Owl, Fiery War Axe, Cruel Taskmaster and Armorsmith, as each one lets you control their first plays. Death’s
Bite is something that should also always be kept against Zoo as it is one of the most efficient ways to handle Dark Iron Dwarf and the back half of a Nerubian Egg. Brawl is also very strong here (but should never be kept) and Execute is strictly for Doomguards. The main rule when playing against Zoo with any class is to never let them keep any minions on board, and that same rule applies here.
Handlock
While not the most popular class of late, Handlock is still something that should be kept in mind. They have a lot of taunts and many ways to stave off your combo. Owl is very important in this matchup, as is Death’s Bite because it can easily kill the first half of your belcher. While they have many ways of stopping you cold, they also are a class that cannot apply too much pressure. Their main threats are four giants, and you have access to four removal spells in the form of Shield Slam and Execute. Play carefully here, play slow and never put them down to low health. At times even fifteen health can be risky, so you want to always go for the Worgen kill here.
 Hunter
You are never safe. That is the most important thing to remember when going up against the likes of Rexxar. I have had many games against Hunter where I was at a comfortable health and armor count only to have my avatar explode in my face (similar to my dreams). Hunter is a class that packs punch after punch and will never stop until the game is over. The rule, much like Zoo, is to never let them have any minions. You have access to a ton of early game removal so mulligan for that exclusively. Their best minion is Savannah Highmane, and that is what you want to try and keep your Owl for. Your hero power is your best friend in this matchup, and that is something that cannot be forgotten. Use it every chance you can.
 Priest
When I first put this deck down on paper I thought Priest was going to be a nightmare. In fact it was almost the opposite. I would say that Priest is one of the easiest matchups in the current meta due to their inability to effectively use cards. Things like Cabal Shadow Priest and Shadow Madness are practically dead here (their only good target being Acolyte of Pain) and they play slow enough that you have enough time to dig for Alexstrasza (making their life irrelevant). Not only that, but after you drop alex they usually will have to spend some mana killing her, which makes it very easy for you to combo off the next turn. My only real advice here is, because of shadow priest, never just play Acolyte onto an empty board past turn six without getting some value out of it.
Shaman
Shaman is a very strange matchup. The reason being that almost every game goes to or near fatigue. The main reason for this is that you are going to spend most of your time removing their minions. This deck is all about playing for the long game, and that is very important when facing Shaman because they are only going to be able to kill you through burst damage due to armor. The main strategy when fighting the elements is to always try and stay out of burst damage, whether that is Bloodlust, Al’akir or Doomhammer. You do this by keeping your armor very high and keeping Shaman’s minions off the board. In
addition, be aware about how much damage your weapons are doing. As Shaman has no healing anytime you hit them in the face you are moving them closer to lethal. However, since these games do to tend go long, Alexstrasza is the most likely path to victory.
 Miracle Rogue
If you have ever played Control Warrior against Rogue the plan here is the same, armor up. Just with Hunter, you want to try and use your hero power as much as you can to make sure they cannot kill you out of nowhere. I would never mulligan Loatheb in this matchup for any reason, as it is the only answer you have to a concealed auctioneer. Brawl is also an answer, but it isn’t strong enough to justify keeping in your opening hand. Use your weapons for removal here, and don’t be afraid to use Alexstrasza on yourself. Rogue only has access to so much damage, and if you gain enough armor they will eventually run out.
 Control Warrior
Welcome to the wasteland. Easily the hardest matchup on the list, Control Warrior is a deck that comes well equipped to handle everything we do. They have taunts, huge legendaries and lots and lots of armor. So much armor that it’s almost hard to keep up if they get an early Armorsmith going. Alexstrasza is a key card here, because without her help it is impossible to do enough damage even with the finisher. In the same vein, I use Grommash to punch through armor before using the Worgen as the main kill. Still, even if the stars align, getting them into lethal range is very hard to do. Your main advantage here is they think you’re playing Control Warrior as well so they will never see the combo coming.
6. Budget Replacements
As with Control Warrior all of the Epics are very necessary to this list. The only legend here is Grommash Hellscream, which I think can be omitted from the deck (though the deck would lack something). If you were to remove the raging orc I would probably add in another owl or maybe the Black Knight as more ways to deal with taunts. That’s it for the week, hope you guys enjoyed the guide and as always, thanks for reading. Until next time, may your worgens always become enraged.
SIMILAR ARTICLES


You must be logged in to reply to this topic.